Event Creation
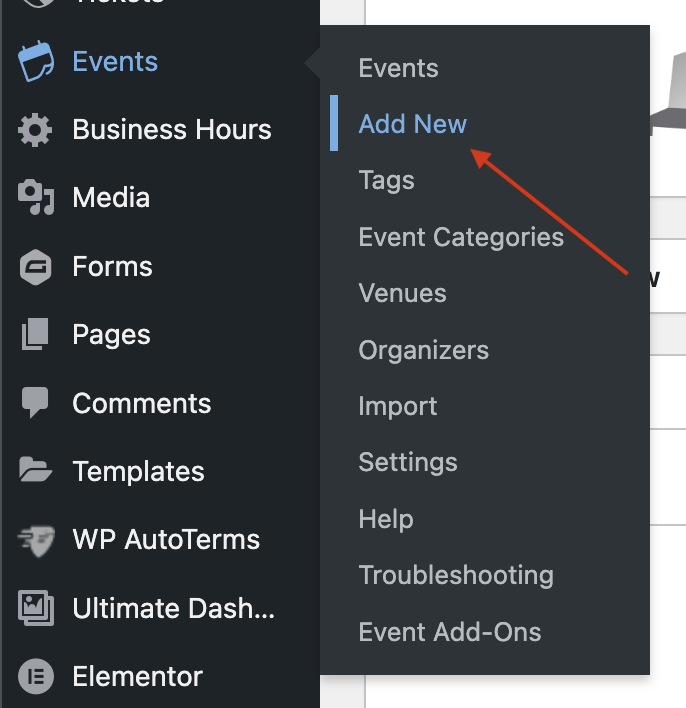
- To create a new event, login to the backend of your website, find Events in the black sidebar and click Add new on the submenu.
- The event editor page looks very similar to the pages/posts editor, however there is an added section after the long description to fill out the event data.
- Add your title of your event, description and then you’ll come to the Event Calendar data section to enter the date/time, venue location, the organizers of the event and you can enter the event’s website if there is a dedicated site to the event.
- If your event has a cost, you can add a Price block. Without Event Tickets, customers won’t be able to purchase a ticket from your website, but they’ll know what to expect to pay at the door.
- On the right-hand side under the Event tab, you can add a Featured Image, Event Categories and Event Tags.
- Once you’re finished, you can click Publish in the top-right corner and your event will display on your event calendar.
Tickets
- To add a ticket to your event, navigate to Events > Events, find the event you created earlier, and click Edit.
- If you scroll down you’ll see a Ticket block. Click Add Ticket.
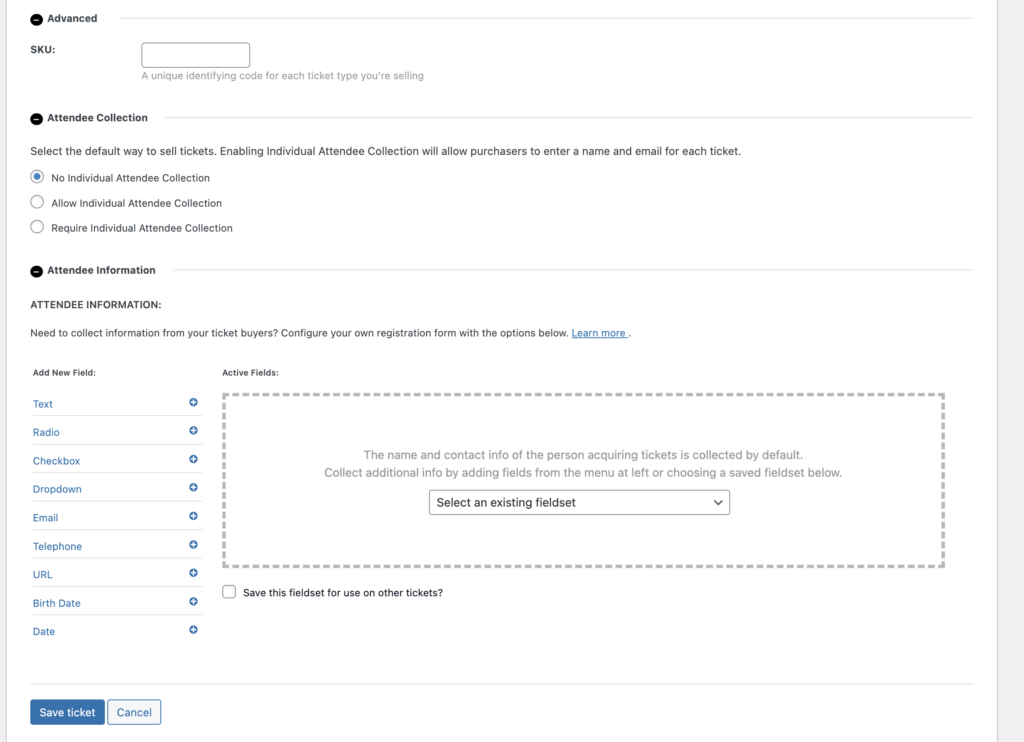
- Tickets offer plenty of options to customize the ticket purchase to your event needs. As you can see, you will be able to fill out the Standard Ticket data, plus have Advanced settings, Attendee Collection Settings, and Attendee Information.


