WordPress and WooCommerce provide methods to import pages/products into their site, however, we Running Robots feel that WP All Import plugin package provides an extended and more advanced platform for importing your data. Setting up your import for thousands of pages, posts or products is very similar to creating a singular post manually. You use the same post template to create a map for WP All Import to follow continuously until all line items have been run. Creating your map is simple in that it is developed for you to drag and drop the line item headers to import.
Importing an XML or CSV with WP All Import
Upload your File
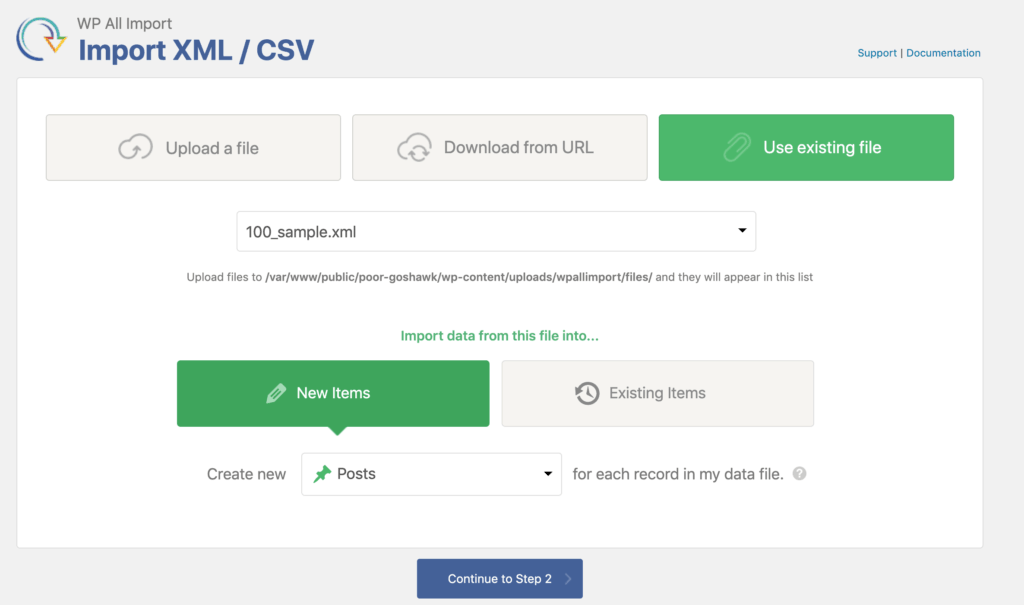
You have three options for how to work with a file upload.
- Upload the File from your local hard drive.
- Download from a URL if your file is on a cloud drive.
- Use an existing file you have already uploaded before.
Next, select if this import is all new times or if this is to update existing items. Last up is to click the dropdown box to choose what you are importing in, there are multiple options built into the base plugin like posts, taxonomies, or pages, but you can also purchase addons to be able to import advanced custom fields, users or products for example.
Review your import data
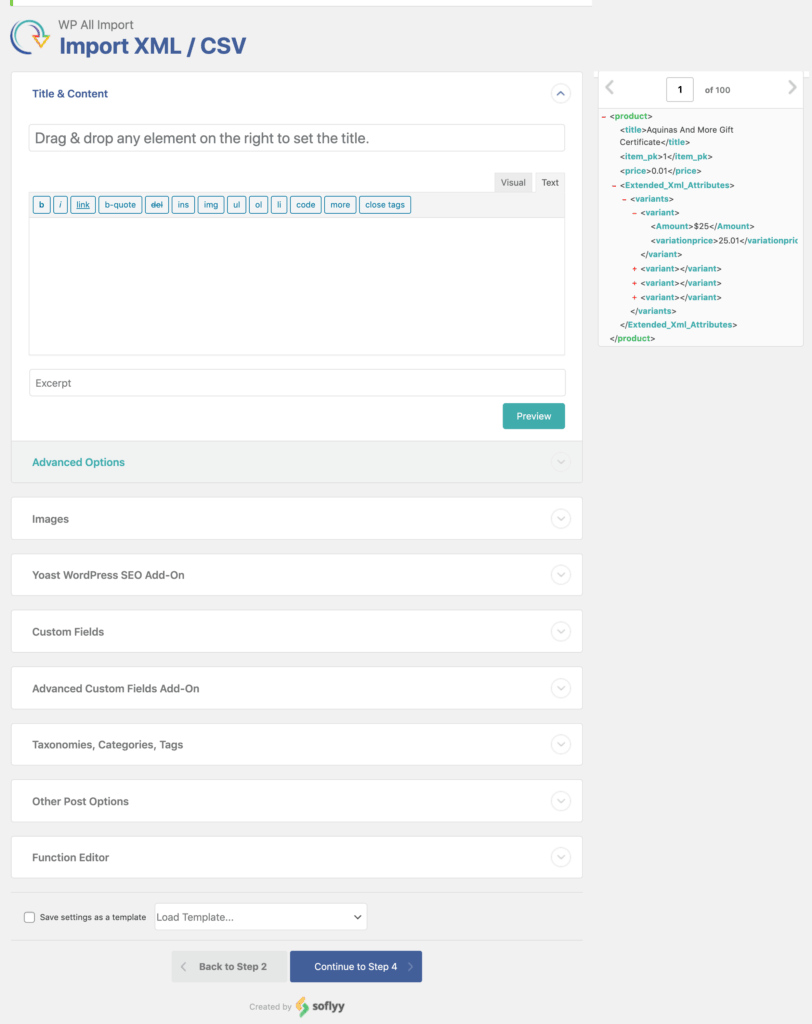
This screenshot below shows an XML import, when you import a CSV you get the same table structure as a CSV with drag-and-drop elements as well.
Configure your mapping
Here you find the different tag elements (tags are words enclosed in brackets: <tag>) to drag and drop into the location of the template. WP All Import then uses this template repetitively until all rows have been run. The title area that says ‘Drag & drop any element to the right to set the title’, would best be filled by you clicking and dragging over the tag element that is labeled ‘title’ ie <title>. You would follow that process through the different accordion options they have to build out your post/etc you are looking to create.
Choose what data to update
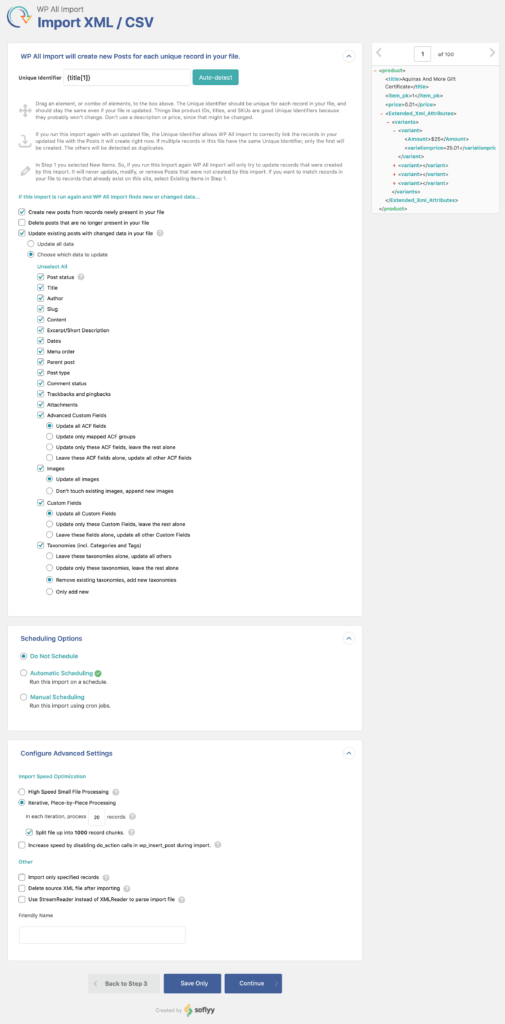
If this import is new, simply uncheck the Update existing posts with changed data in your file. If you are updating existing products, I find it is best to tell the system exactly which fields you want it to map to and update. If you choose to select all and you have existing fields that you did not update in your sheet, it may erase that data assuming you mean it is no longer relevant after completing this new import for update.
Confirm & Run Import
I HIGHLY recommend taking a backup of your site before pressing Run. This is a powerful importing program, if you found you made a major mistake, it may be best to start with a clean slate rather than try to untangle a mess.
How to Export WordPress to CSV, Excel, and XML
Select a WordPress Post Type to Export
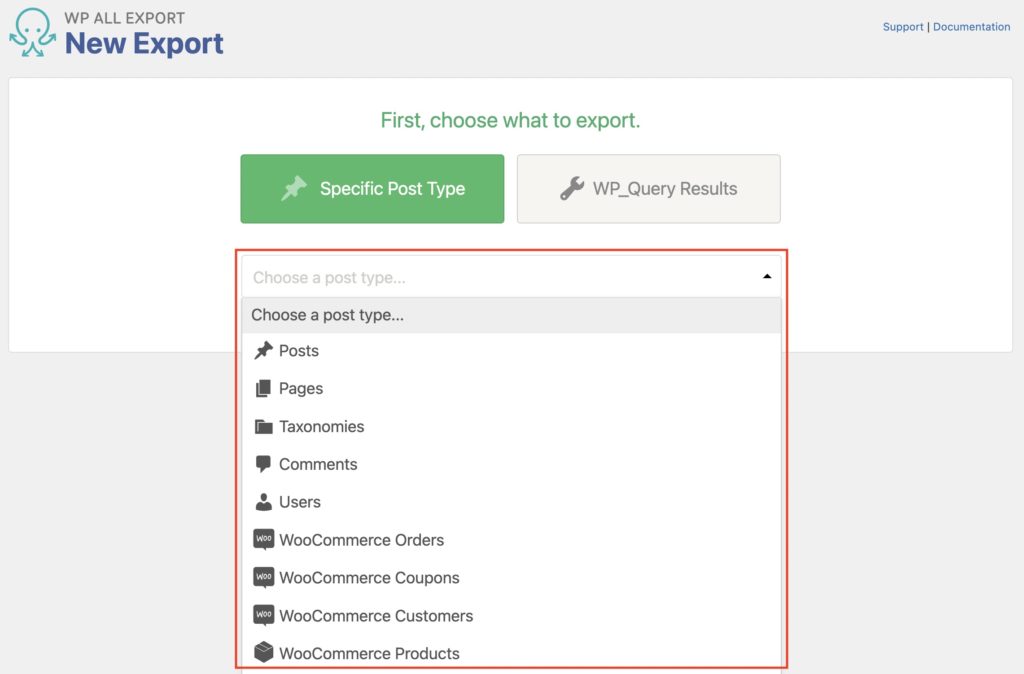
WP All Import needs a WP All Export to complete the job, when setting up your export, your first screen asks you what you need to export. Some of the items shown below are purchasable add-ons, but to export your pages or posts, that is a default functionality.
Customize Your WordPress CSV/XML Export
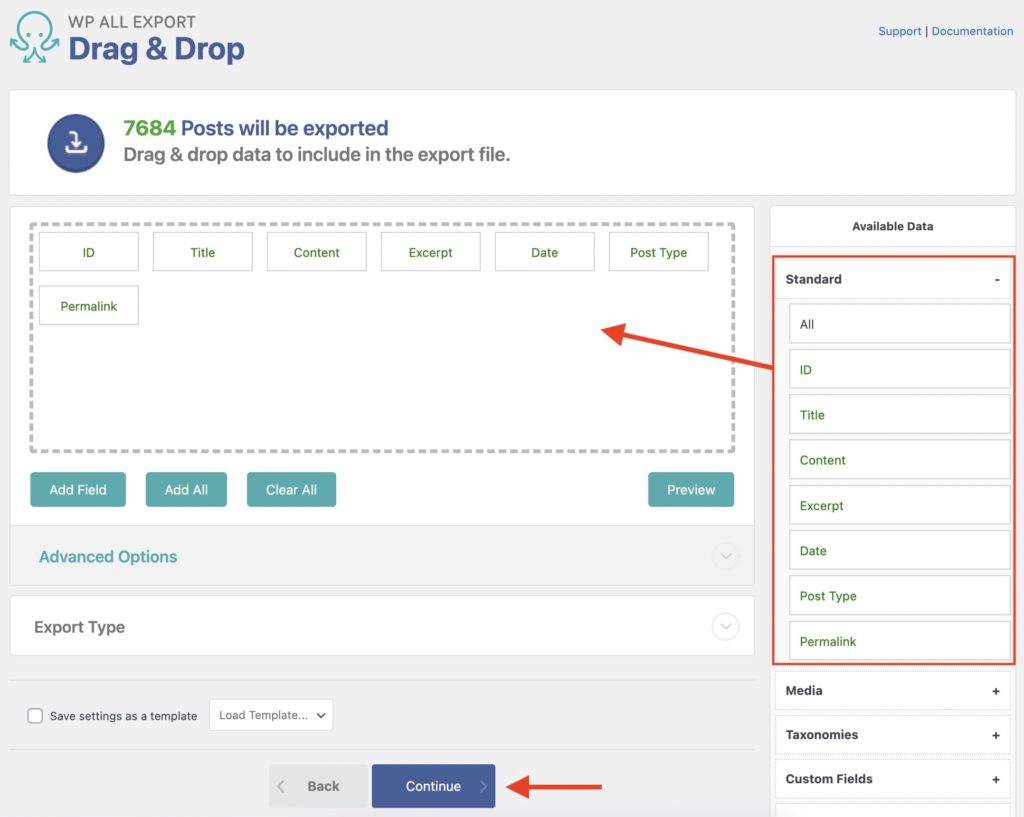
For this example, Posts was selected and WP All Export found 7,684 posts to export. The next screen allows you to build your spreadsheet, from the right column drag and drop the column headers you would like to export from your website. If this is a common export you need to execute, it may be worth it to save it as a template so it will auto-populate your right column selections in a snap next time you are ready to export.
Confirm and Run Your Export
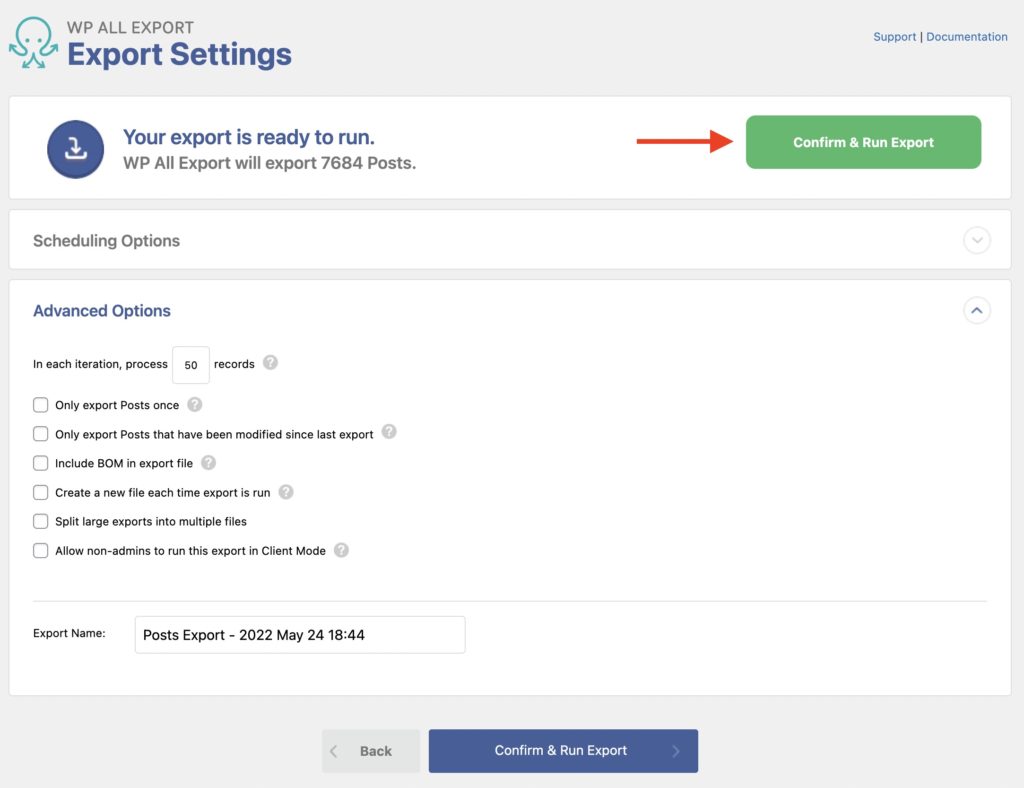
Once you have all your column heads selected, you can confirm you are ready and run the export. They do provide advanced settings if you need, but often times you can leave them unchecked.
Download Your WordPress CSV/XML Export
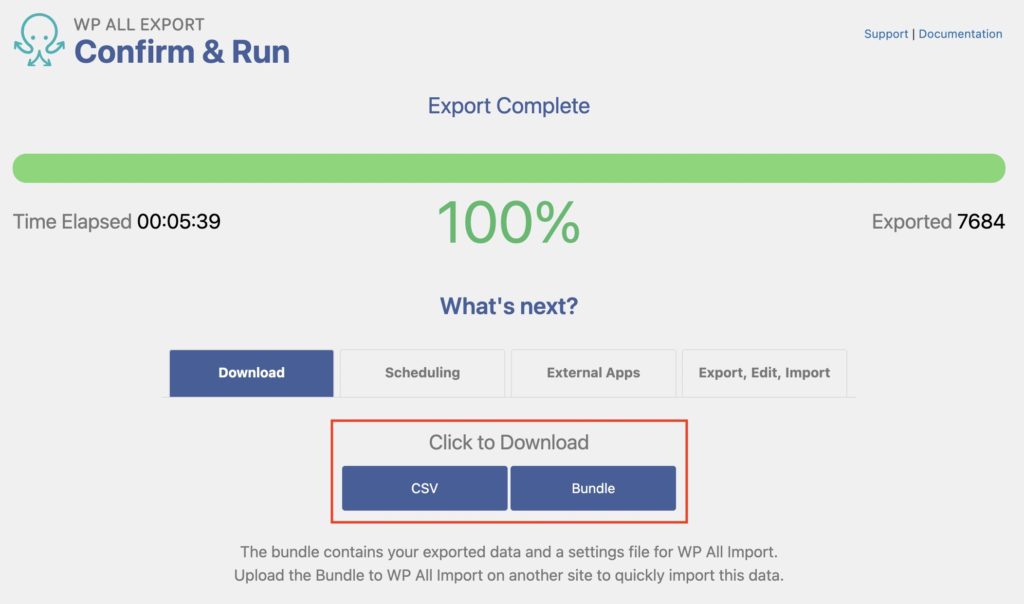
Once the export is complete, you will be provided two options for export, either a simple CSV or a Bundle, the bundle is a zipped folder that contains the CSV but also data for WP All Import to receive all the mapping data so you do not have to do the mapping like the steps we completed above.
