Ecommerce has blown up of late, partially thanks to the COVID era we are currently living in. As a result, small business owners are finding new ways to get their products into consumers’ hands and homes. While many have found quick solutions to this through Etsy and Amazon, the downfall can be the percentage you have to pay to use their platform. Having your own site allows you to control the costs, bottom line, and cut out the middleman.
WooCommerce comes in as an excellent solution for those Do-it-Yourself types that want to keep costs of selling their products online to a minimum. Running Robots has created this article to help prepare yourself with the basics: 5 Questions to Ask Yourself Before Opening an Online Store: What do you need to make a store.
Getting started with WooCommerce
WooCommerce is a plugin you use with your WordPress website to upgrade it from a blog/brochure site to include E-Commerce functionality. When you install WooCommerce, it automatically creates the pages you need to have a store set up on your website. Those pages include a cart, checkout page, my account page, and the shop page itself. WooCommerce will walk you through a step-by-step wizard where you will enter your store address, your industry, your types of products, and then you will be provided a series of optional choices to enhance your store with plugin programs to connect to companies like Facebook or Mailchimp.
To see all the steps prior to installing, visit: WooCommerce Setup Wizard Guide Documentation provided by WooCommerce.
How to enter your first product
Once you have logged into your WordPress Dashboard, look to your main black navigation area on the left and hover over Products, a flyout menu will appear. Select New Product.
Starting from the top left and working down:
-
Title: Enter the title of the product, in this example, it’s Caramel (popcorn)
-
Permalink: This is the link to the product, you can make it what you like, but what is automatically added is the title from this page is typically the best permalink.
-
Long Description: Enter a long description of your product here, this can include industries it would be useful for or any other keywords that would apply to the product to help produce a strong detail about your product for Google or other search engines to crawl.
-
Product Data Section: This will be broken down tab by tab in the next section of this article, but it is where all the product details need to be entered.
-
Short Description: This is a small summary of your product, or possibly a list of what is included in the product.
-
Back up to the top right column, Publish: All the settings available to publish your page, product, or article are found in this section. One of many options of this section, you can set the product to draft if you are not ready for it to be visible on the front end of your website.
-
Product Categories: Having a category hierarchy of your products produces additional ways to show your products for clients to filter by. To really dive deep into categories, tags, and product archives, follow the in-depth coverage by WooCommerce in their article: Managing Product Categories, Tags & Attributes.
-
Product Image: The main image that displays your product when the client visits the product page.
-
Product Gallery: If your product needs to have multiple angles/views, you can use this section to add multiple photos.
Product Data Section Explained
General Tab:
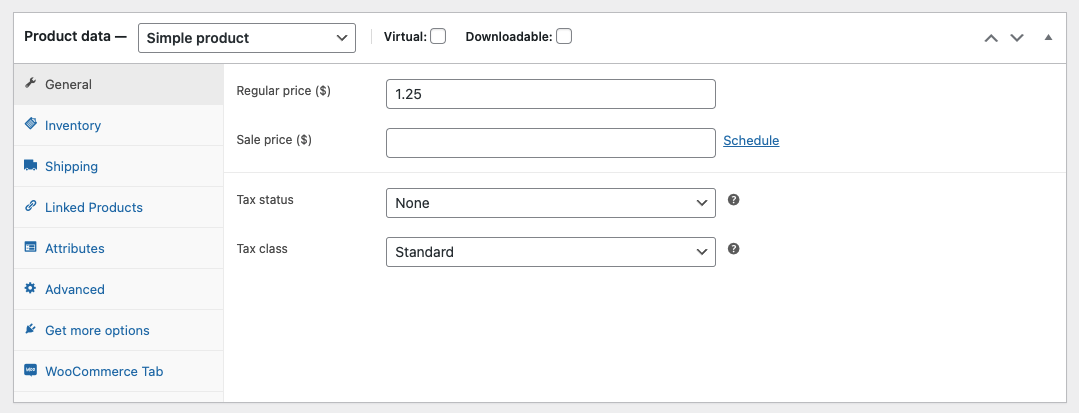
- Regular Price: Enter the cost of the product
- Sale Price: WooCommerce offers the option to display the product with a sale price, you can even schedule it so that it only runs to the date you wish to have it end.
- Tax Status: Select if you need to have tax charged for this product or not
- Tax Class: You can develop tax classes so that when a client is in a specific location you can charge the appropriate tax rate. To learn how to set up tax classes check out: Setting up Taxes in WooCommerce
Inventory Tab:
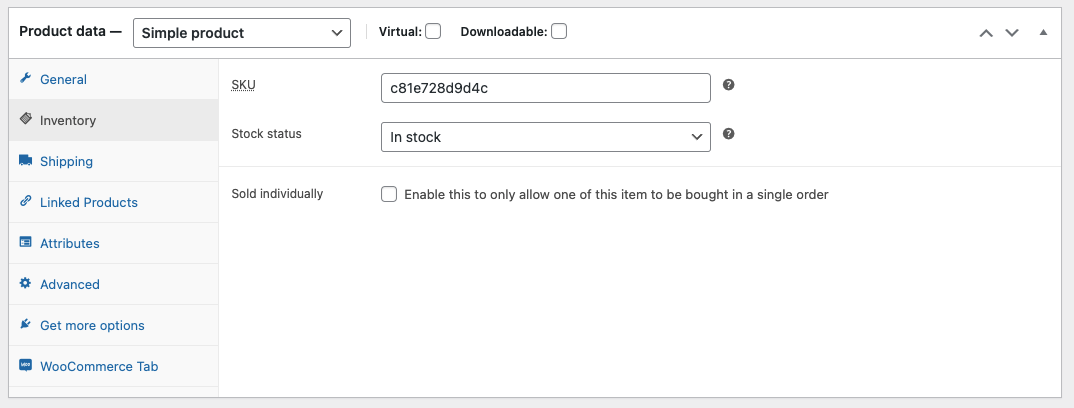
- SKU: Stock Keeping Unit Number for this product, if you don’t use SKUs you can enter any term to represent the product.
- Stock Status: If you run out of stock of this item, you don’t need to delete it from your store, simply mark it out of stock and allow people to place backorders if you wish.
- Sold individually: Check if you only want to allow one product to be purchased per transaction.
Shipping Tab:
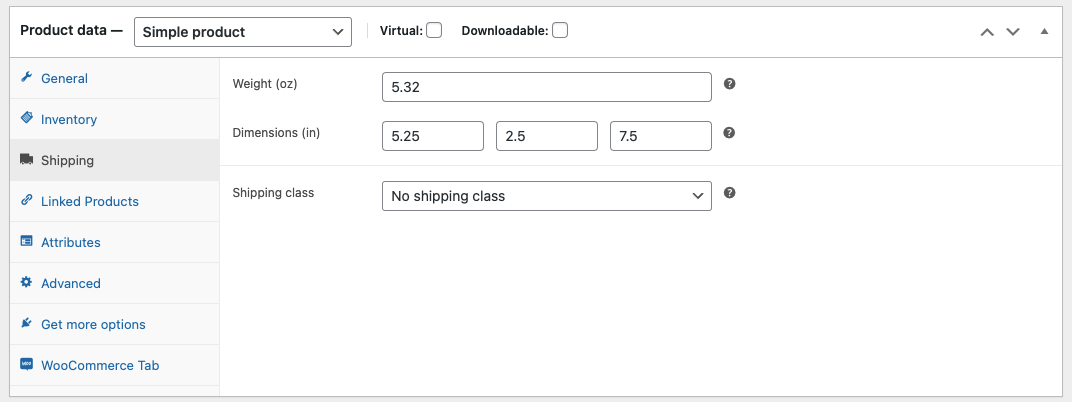
- Weight: Shipping weight of the product
- Dimensions: Shipping dimensions of the product
- Shipping Class: This is a method to group products with the shipping rates you create. To dive deeper, check out: Product Shipping Classes by WooCommerce
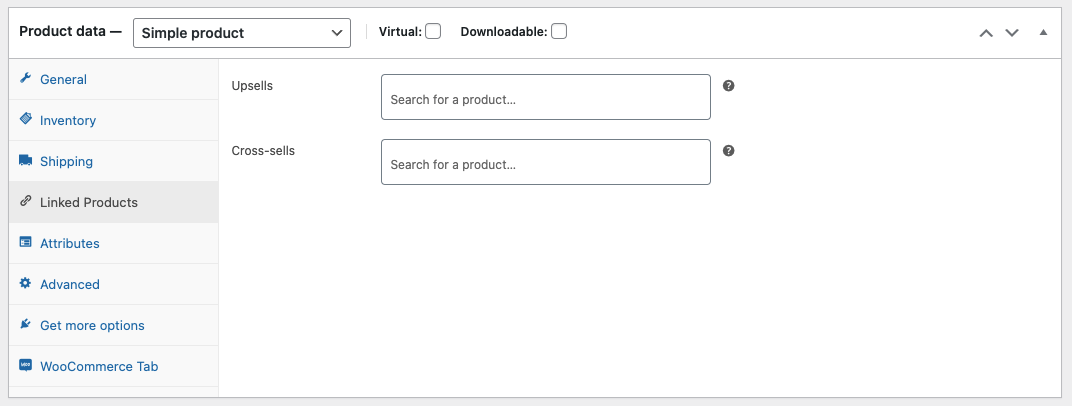
Linked Products Tab:
- Upsells: Encourage customers shopping this product page to view and purchase a higher-end version or variation.
- Cross-sells: In the cart page, display additional products that are possibly bought together with this product to entice the user to make additional purchases before the final checkout.
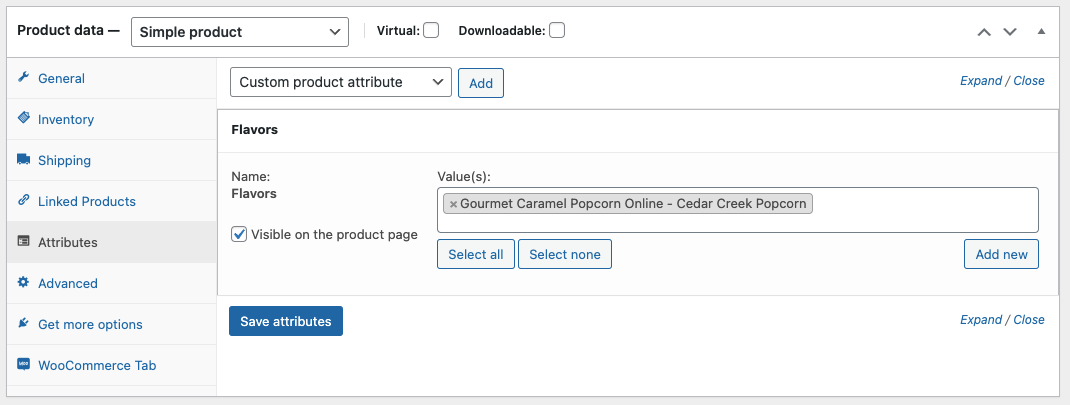
Attributes Tab (Simple Product):
Self Created: You will create attributes to describe your product, for this example for Caramel Corn:
- Flavors: Value = Gourmet Caramel Popcorn Online – Cedar Creek Popcorn
- Visible on the product page checkbox: this allows a table to produce dynamically on the product page displaying all the attributes that are affiliated with your product — these are excellent keywords that search engines crawl to find items that are being searched for.
Attributes Tab (Variable Product):
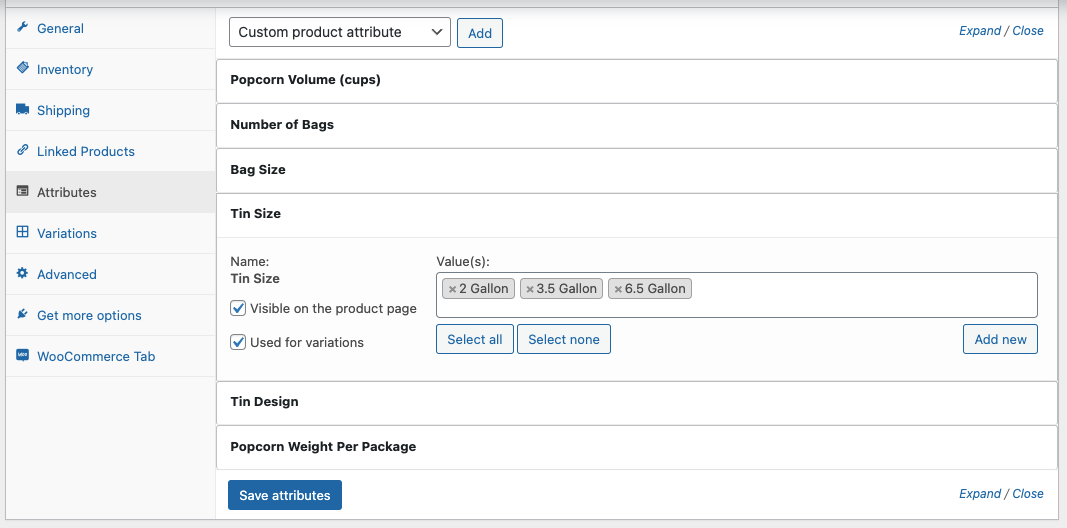
- Custom product attribute (dropdown): Use this to create new attributes to provide more insight into your product.
In this example, our attributes are about Caramel Corn:
- Popcorn Volume
- Number of Bags
- Bag Size
- Tin Size
- Tin Design
- Popcorn Weight per Package
Tin Size is used as a variation of this caramel corn product because we offer 3 options to choose from in the product selection, 2 gallon, 3.5 gallon, and 6.5 gallon. So we have visible on the product page and used for variations selected for this product.
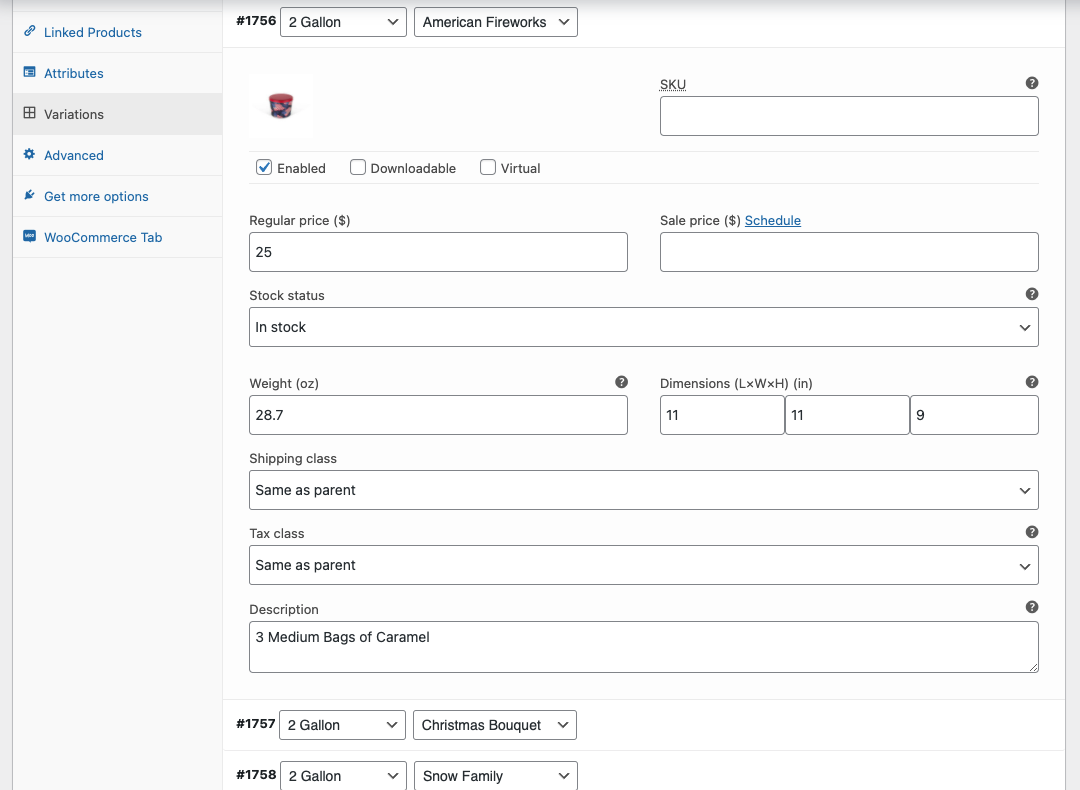
Variations Tab (Variable Product):
After you completed your attributes tab and have selected certain attributes to display as variations, you need to tell WooCommerce to produce all attribute combinations, in this example, we have 2 variations: Tin Size and Tin Design. Using the dropdown that says ‘Add Variation’, select Create variations from all attributes. Click go, the browser will prompt you to make sure you know it will only produce 50 variations at a time, so you may need to click go a few times until you have all variations created. Read on Variable Products by WooCommerce to get further directions.
You will find most of the same tab data from above is repeated here in case you need to set different SKUs, weights, etc. for the different variations of the product.SKU
- Description: This provides a variation-only description that displays if the user selects this exact combination.
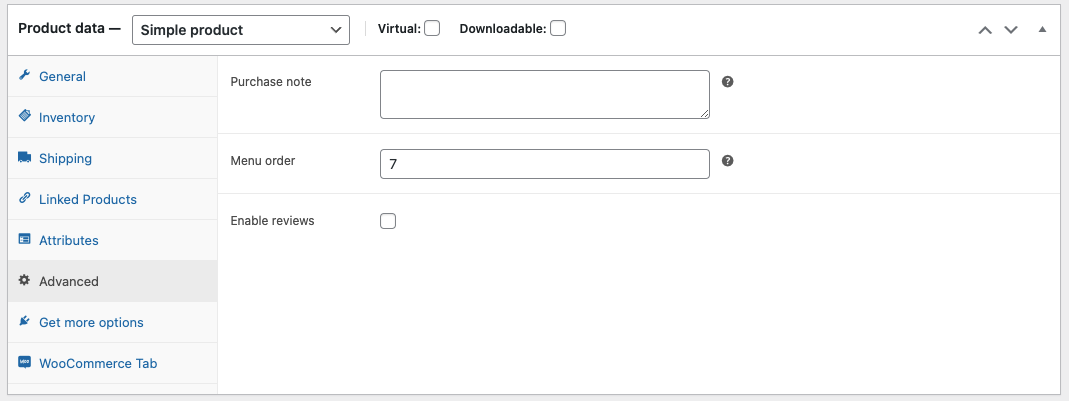
Advanced Tab:
- Purchase Note: This allows you to add a note to the email receipt the user will receive when they purchase your product.
- Menu Order: If you want to have this product always appear at the top of your store, set this to 1, if you don’t have an order in mind with your products you can leave this at zero and it will use the default method you set the display of your products (ascending alphabetical for example).
- Enable Reviews: This is misleading, there is a global setting in WooCommerce > Settings that lets you set reviews to be enabled store-wide. If you disable that global setting, but you do want certain products to allow users to leave product reviews, you enable this option, otherwise, leave it unchecked.

Wrapping Up Products
There are tons of additional 3rd party plugins that can add insane amounts of functionality to your store, but it can be argued that if you can take the time to build out the core of your product line with strong descriptions, keywords, and attributes, you will then have a solid foundation to build off of.


